
Please note the following:
|
|
You will need to use TurboVNC to take advantage of graphics hardware acceleration on the visualization partition.
Note: Installation of TurboVNC may require administrator privileges. If you do not have admin privs, you may need to ask your desktop support to install TurboVNC.
Windows
Mac
Connecting to a visualization session is a 3 step process.
Troubleshooting: "Unable to contact settings server" error with black screen:
If you see a black screen and get an error referencing a failure to connect to a /tmp/dbus-***** socket you probably had a conda environment activated when you executed the svis command. Exit the session and double check that you don't have a conda environment activated and you don't have any code in your ~/.bashrc file that will automatically activate a conda environment.
Detailed instructions for each step follow:
Step 1. Connect to the biowulf login (using one of the methods detailed here) and execute the svis command.
Note that svis will accept and pass some options to Slurm, but the vast majority of users will want to execute this command with no options. This command will also grant you an entire vis node, so there is no reason to pass any options specifying CPUs, memory, lscratch, etc.
[user@biowulf ~]$ svis
salloc.exe: Pending job allocation 7130309
salloc.exe: job 7130309 queued and waiting for resources
salloc.exe: job 7130309 has been allocated resources
salloc.exe: Granted job allocation 7130309
salloc.exe: Waiting for resource configuration
salloc.exe: Nodes cn0655 are ready for job
srun: error: x11: no local DISPLAY defined, skipping
[+] Loading TurboVNC
Starting VNC server ... please be patient...
VNC server started on display 2 port 5902
VNC configured with SSH forwarding.

After creating a tunnel from your workstation to biowulf.nih.gov
port 42303, connect your VNC client to localhost port
42303. See https://hpc.nih.gov/nih/vnc for details.

The VNC connection will terminate when this shell exits.


Please create a SSH tunnel from your workstation to these ports on biowulf.
On Linux/MacOS, open a terminal and run:

    ssh  -L 42303:localhost:42303 user@biowulf.nih.gov

For Windows instructions, see https://hpc.nih.gov/docs/tunneling


[user@cn0655 ~]$
Take note of the instructions from the previous command to be used in Step 2. In this example we were allocated port 42303 but the port you recieve will likely be different.
Step 2. In a new terminal window on your desktop workstation, follow the instructions from the previous command to create your ssh tunnel. Use the port number you were assigned rather than this one.
[user@my_workstation.nih.gov ~]$ ssh -L 42303:localhost:42303 user@biowulf.nih.gov
                           ***WARNING***

You are accessing a U.S. Government information system, which includes
(1) this computer, (2) this computer network, (3) all computers
connected to this network, and (4) all devices and storage media
attached to this network or to a computer on this network. This
information system is provided for U.S.  Government-authorized use only.

Unauthorized or improper use of this system may result in disciplinary
action, as well as civil and criminal penalties.

By using this information system, you understand and consent to the
following:

* You have no reasonable expectation of privacy regarding any
communications or data transiting or stored on this information system.
At any time, and for any lawful Government purpose, the government may
monitor, intercept, record, and search and seize any communication or
data transiting or stored on this information system.

* Any communication or data transiting or stored on this information
system may be disclosed or used for any lawful Government purpose.

--
Notice to users:  This system is rebooted for patches and maintenance on
the first Monday of every month at 7:15AM unless Monday is a holiday, in
which case it is rebooted the following Tuesday.  Running cluster jobs
are not affected by the monthly reboot.

user@biowulf.nih.gov's password:
Last login: Thu Jan 28 09:53:58 2021 from my_workstation.nih.gov

[user@biowulf ~]$
Leave both of these terminal windows open for the duration of your session.
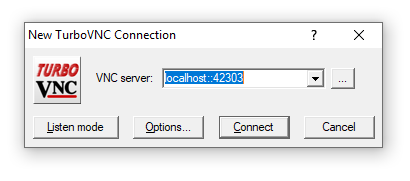
Step 3. Open a TurboVNC viewer on your local workstation and direct it to localhost::<port number> where <port number> is the port you received in the instructions in step 1. Click 'Connect'.
Follow the next prompt instructing you to enter a username and password. Use your NIH login username and password.

And you will see a new desktop session.
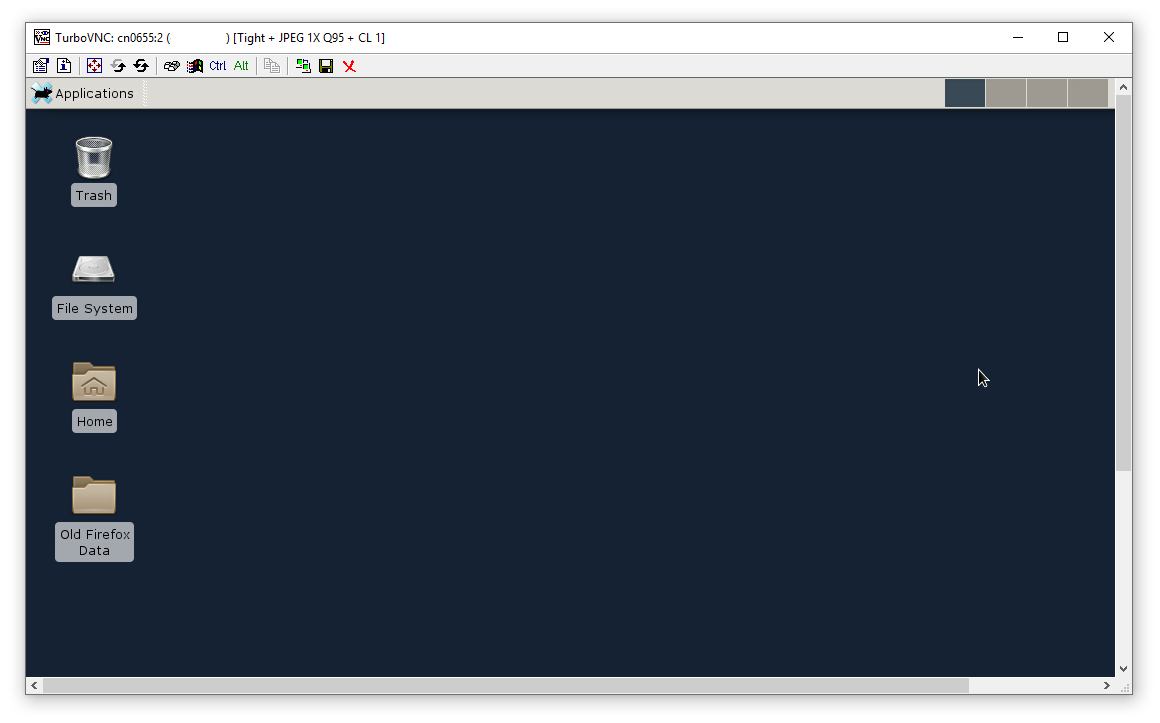
This desktop session is properly configured to render graphics using the remote GPU hardware and ship the rendered graphics to your local workstation with high efficiency. But additional steps are necessary to make sure that your applications take advantage of this configuration.
back to topOnce you have established a desktop session on a visual partition node you must take several steps to ensure it uses the GPU hardware.
Running MATLAB on a visual node is much the same as the example above with the small difference that MATLAB must be started with the -nosoftwareopengl flag.
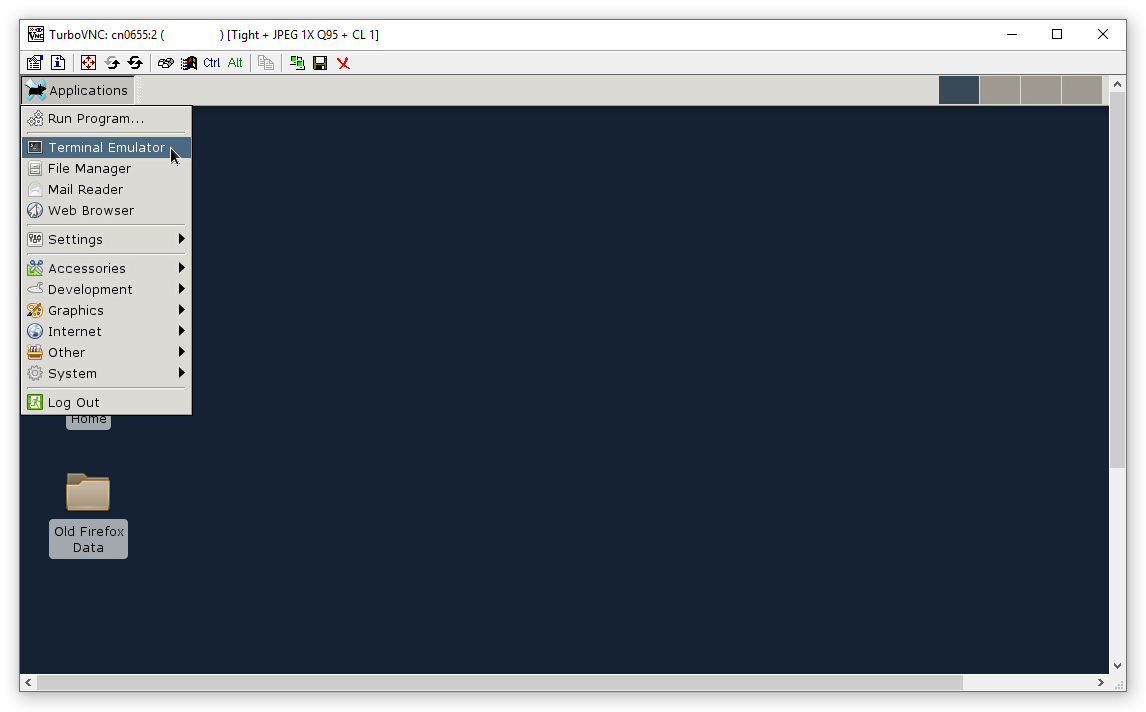
First we open a terminal in the new desktop.
Then in the new window we enter the following (user input in bold).
[user@cn0655 ~]$ module load matlab virtualgl
[+] Loading Matlab  2020b  on cn0655
[+] Loading VirtualGL

[user@cn0655 ~]$ vglrun matlab -nosoftwareopengl
You will see the MATLAB IDE.

And you can once again verify that it is running on the GPU hardware with nvidia-smi.
[user@cn0655 ~]$ nvidia-smi Thu Jan 28 21:01:52 2021 +-----------------------------------------------------------------------------+ | NVIDIA-SMI 450.51.06 Driver Version: 450.51.06 CUDA Version: 11.0 | |-------------------------------+----------------------+----------------------+ | GPU Name Persistence-M| Bus-Id Disp.A | Volatile Uncorr. ECC | | Fan Temp Perf Pwr:Usage/Cap| Memory-Usage | GPU-Util Compute M. | | | | MIG M. | |===============================+======================+======================| | 0 Tesla K20Xm On | 00000000:00:07.0 Off | Off | | N/A 32C P8 19W / 235W | 18MiB / 6083MiB | 0% Default | | | | N/A | +-------------------------------+----------------------+----------------------+ +-----------------------------------------------------------------------------+ | Processes: | | GPU GI CI PID Type Process name GPU Memory | | ID ID Usage | |=============================================================================| | 0 N/A N/A 1166 G X 14MiB | | 0 N/A N/A 8073 G ...R2020b/bin/glnxa64/MATLAB 1MiB | +-----------------------------------------------------------------------------+back to top
We've selected visualizations in several different programs that benefit from hardware acceleration. These demonstrations are all intended to be carried out within a VNC session as detailed above. User input in bold. Standard output omitted for clarity.
AFNI / SUMA
Plot a 3D brain rendering with connectome data superimposed.
[user@cn0655 ~]$ mkdir -pv /data/${USER}/test/afni

[user@cn0655 ~]$ cd !$

[user@cn0655 afni]$ module load afni virtualgl

[user@cn0655 afni]$ @Install_FATCAT_DEMO

[user@cn0655 afni]$ cd FATCAT_DEMO/

[user@cn0655 FATCAT_DEMO]$ tcsh Do_00_PRESTO_ALL_RUNS.tcsh # this will take a while

[user@cn0655 FATCAT_DEMO]$ vglrun tcsh Do_09_VISdti_SUMA_visual_ex3.tcsh
VMD
Render the crystal structure of five 70s ribosomes from E-Coli in complex with protein Y. (717k atoms)
[user@cn0656 ~]$ cd /lscratch/$SLURM_JOB_ID

[user@cn0656 9233588]$ wget https://files.rcsb.org/download/4V4G.cif.gz

[user@cn0656 9233588]$ gunzip 4V4G.cif.gz

[user@cn0656 9233588]$ module load vmd virtualgl

[user@cn0656 9233588]$ vglrun vmd 4V4G.cif
ChimeraX
Render the crystal structure of five 70s ribosomes from E-Coli in complex with protein Y. (717k atoms)
[user@cn0656 ~]$ cd /lscratch/$SLURM_JOB_ID

[user@cn0656 9233588]$ wget https://files.rcsb.org/download/4V4G.cif.gz

[user@cn0656 9233588]$ gunzip 4V4G.cif.gz

[user@cn0656 9233588]$ module load ChimeraX

[user@cn0656 9233588]$ vglrun ChimeraX 4V4G.cif
FSLeyes
View a niftii data set containing an example structural (T1) brain image.
[user@cn0655 ~]$ cd /lscratch/$SLURM_JOB_ID

[user@cn0655 9349741]$ wget https://www.fmrib.ox.ac.uk/primers/intro_primer/ExBox13/ExBox13.zip

[user@cn0655 9349741]$ unzip ExBox13.zip

[user@cn0655 9349741]$ module load fsl virtualgl

[user@cn0655 9349741]$ vglrun fsleyes ExBox13/T1_brain.nii.gz
Schrödinger
View a basic phospholipase A2 (2,108 atoms).
[user@cn0655 ~]$ cd /lscratch/$SLURM_JOB_ID

[user@cn0655 9400228]$ wget https://files.rcsb.org/download/1JIA.pdb.gz

[user@cn0655 9400228]$ gunzip 1JIA.pdb.gz

[user@cn0655 9400228]$ module load schrodinger virtualgl

[user@cn0655 9400228]$ vglrun maestro -NOSGL 1JIA.pdb
Please send questions and comments to staff@hpc.nih.gov