Visual Studio Code is a code editor redefined and optimized for building and debugging modern web and cloud applications. It might be a good idea to install "Remote Development" extension pack which allows you to open any folder in a container, on a remote machine, or in the Windows Subsystem for Linux (WSL) and take advantage of VS Code's full feature set. It includes 'Remote SSH', 'Remote Containers' and 'Remote WSL' extensions.
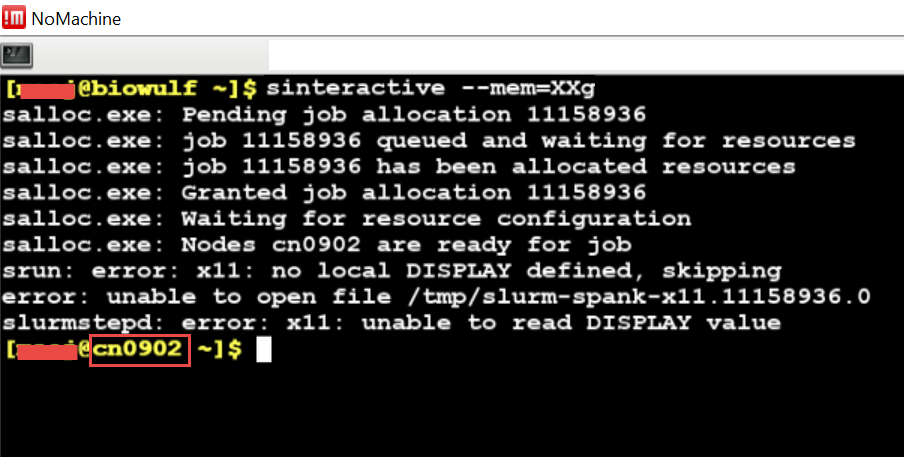
VS Code ( vscode ) should ONLY be run from computational nodes. Do not run VS Code on Biowulf or Helix. Please follow instructions on this page to run on compute node. Please contact staff@hpc.nih.gov if you run into issues while following the below steps.
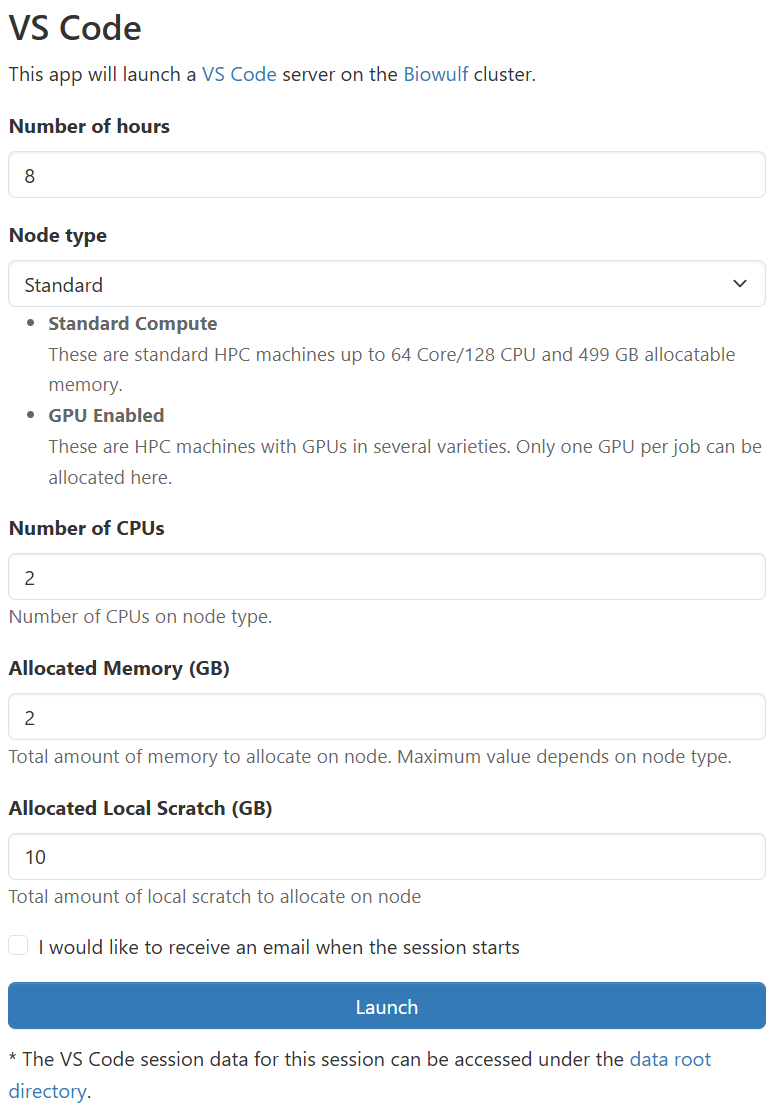
This application can be utilized interactively via the HPC OnDemand web interface.
We recommend using HPC OnDemand to access Visual Studio Code. This uses Open OnDemand to provide a convenient interface to launch and access VS Code sessions in interactive jobs without requiring complex SSH tunneling and configuration.
This method provides the same interface as a native installation of VS Code inside a browser window. Rather than using the Remote SSH extension to connect to a remote host, VS Code is running natively on a compute node in a Slurm job with the interface presented to you via web browser using secure Open OnDemand proxies. The first time you connect to VSCode, you will need to configure any VSCode extensions you wish to use. On subsequent VSCode sessions, your extensions will automatically load from your home directory on Biowulf.
To access VS Code via Open OnDemand, you navigate to the VS Code application page, configure the resources your job requires, and launch your job.
For more information about Biowulf's Open OnDemand installation, access, and other services available please see our documentation.
We encourage you to try using VS Code via Open OnDemand as it provides a much simpler and more stable connection to VS Code running on the Biowulf cluster and should support nearly all use cases that the remote SSH method supports.
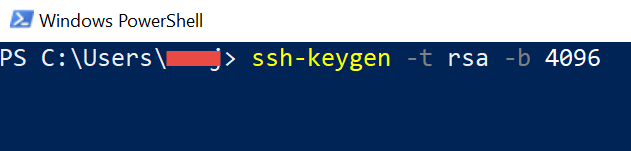
ssh-keygen -t rsa -b 4096. The key should be passphrase protected.
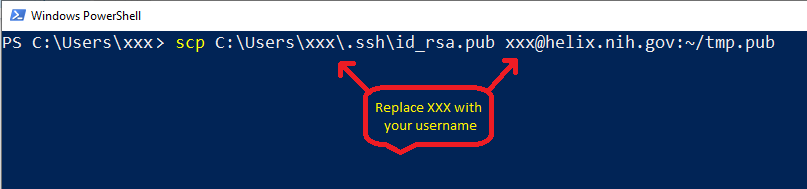
scp C:\Users\xxx\.ssh\id_rsa.pub xxx@helix.nih.gov:~/tmp.pub
    helix $ mkdir -p ~/.ssh
    helix $ chmod 0700 ~/.ssh
    helix $ cat tmp.pub >> ~/.ssh/authorized_keys
    helix $ rm tmp.pub
    helix $ chmod 0600 ~/.ssh/authorized_keys
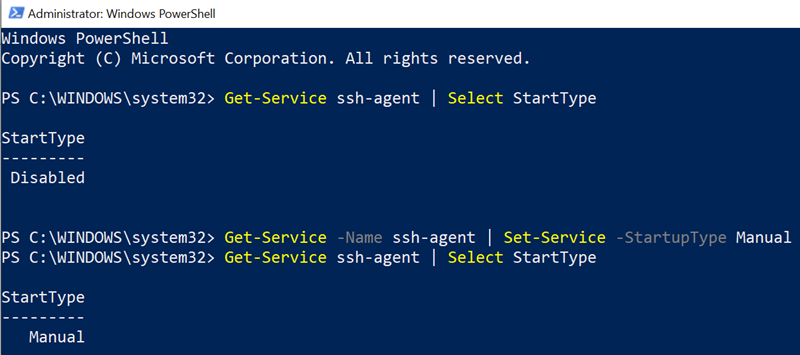
Get-Service ssh-agent | Select StartTypeGet-Service -Name ssh-agent | Set-Service -StartupType Manual
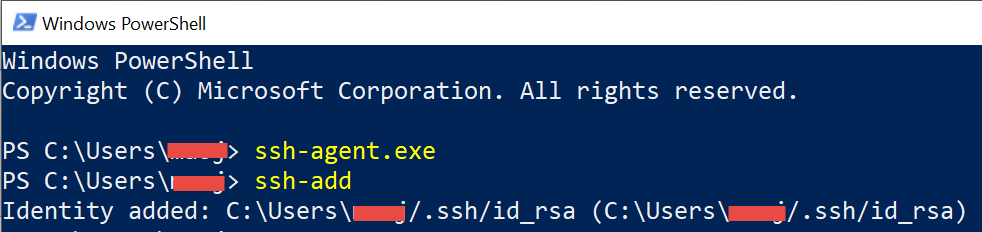
ssh-agent.exe ssh-add
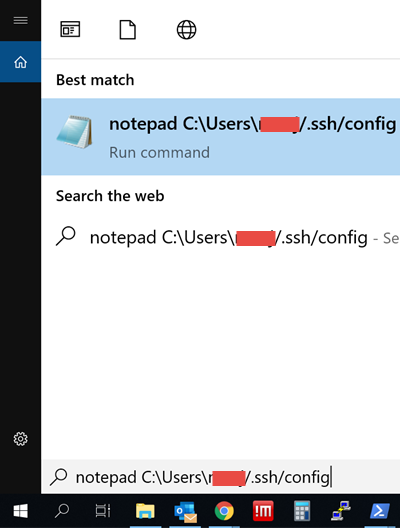
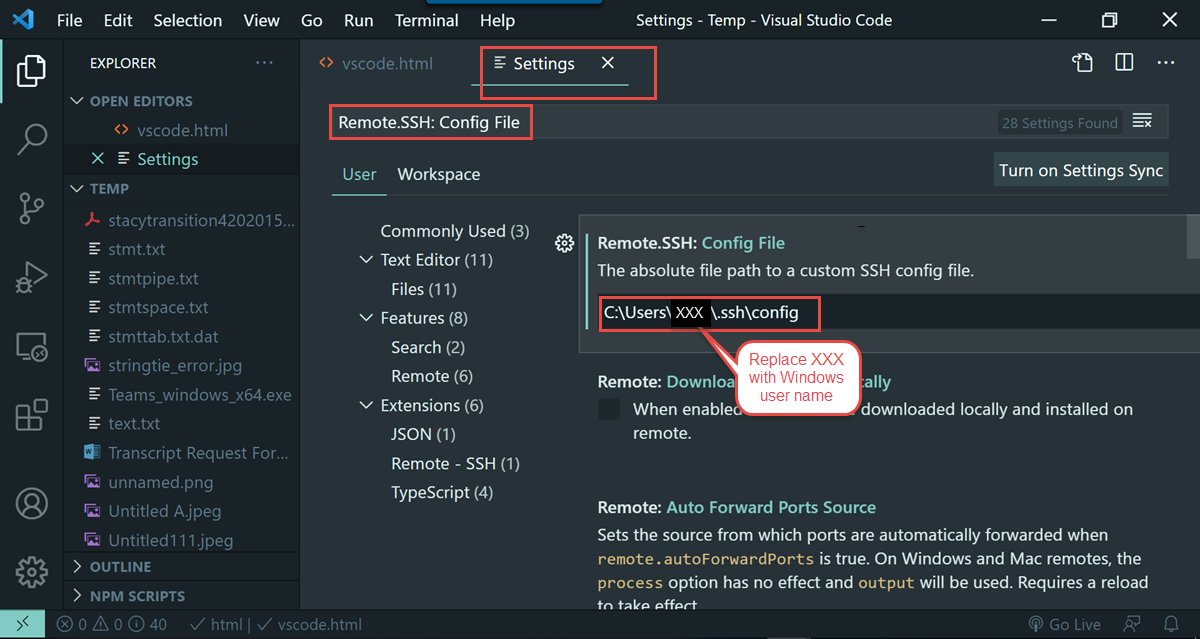
notepad C:\Users\xxx\.ssh\config and press enter. Replace xxx with your own user name.
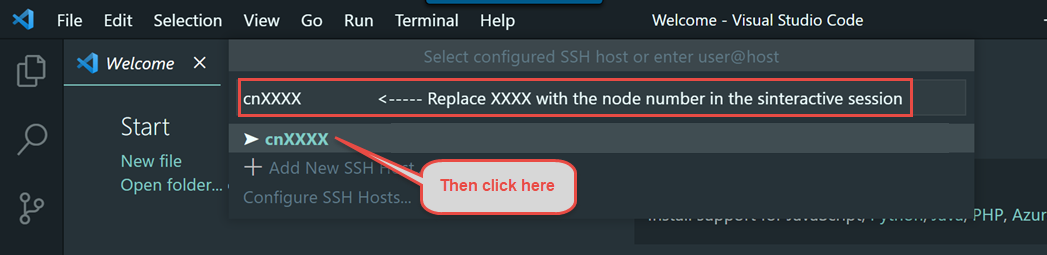
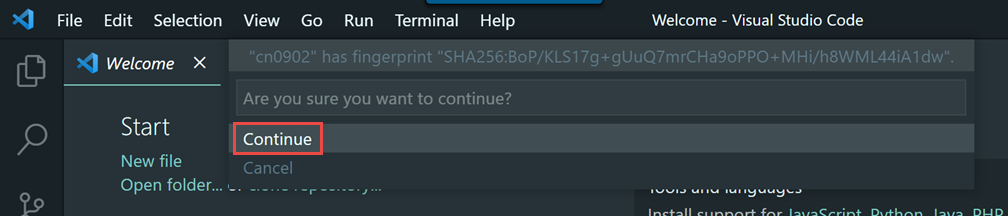
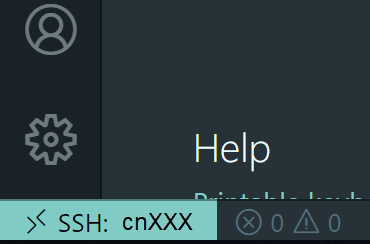
Host cn*
User xxx
ProxyCommand C:\Windows\System32\OpenSSH\ssh.exe -o ForwardAgent=yes xxx@biowulf.nih.gov nc -w 120ms %h %p

C:\Users\XXX\.ssh\config

We encourage you to try using VS Code via Open OnDemand as it provides a much simpler and more stable connection to VS Code running on the Biowulf cluster and should support nearly all use cases that the remote SSH method supports.
The instructions for Mac OSX is very similar to the Windows instructions
Host cn*
User $username
ProxyCommand /usr/bin/ssh -o ForwardAgent=yes $username@biowulf.nih.gov nc -w 120ms %h %p
/Users/$username/.ssh/config
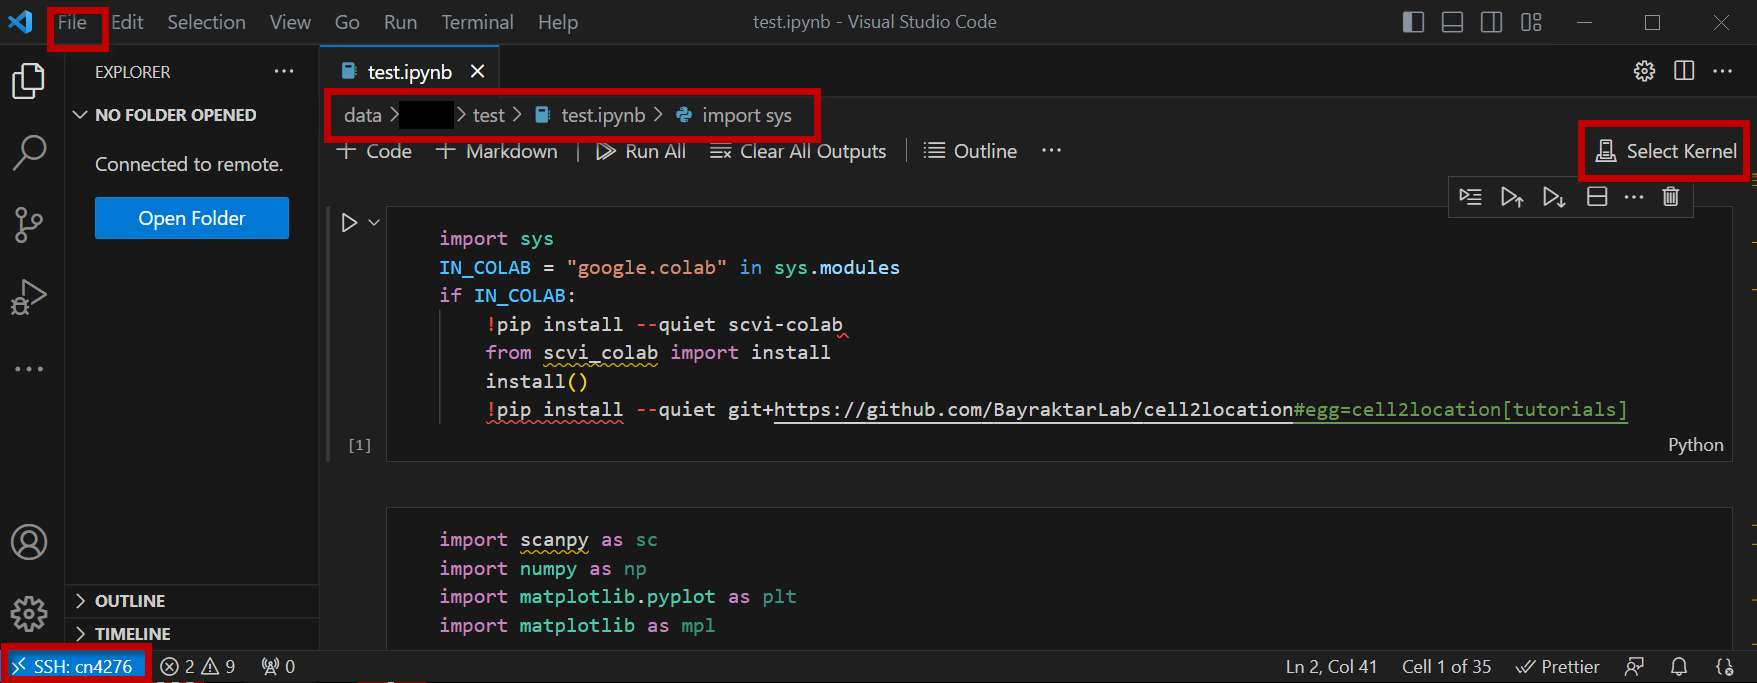
You are now running Jupyter Notebook on a compute node.
Please see the Biowulf Jupyter page for more information about running Jupyter outside VS Code on Biowulf.