|
Quick Links
Globus is a service that makes it easy to move, sync, and share large amounts of data. Globus will manage file transfers, monitor performance,
retry failures, recover from faults automatically when possible, and report the status of your data transfer. Globus uses GridFTP for more reliable
and high-performance file transfer, and will queue file transfers to be performed asynchronously in the background.
| Globus was developed and is maintained at the University of Chicago and is used extensively at supercomputer centers and major research facilities. [Globus website] No matter how you transfer data in and out of our systems, be aware that PII and PHI data cannot be stored or transferred into the NIH HPC systems except under special arrangements.
|
Biowulf/CIT has also funded Globus connectors for Amazon Web Services (AWS) and Google Cloud. See the sections below for details on how to use these connectors.
This Globus connector allows users to transfer data between their own AWS S3 buckets and any other Globus endpoint, including the NIH HPC (Biowulf) endpoints. Please note that HPC/Biowulf/CIT does not provide or fund AWS accounts for users.
This connector has been configured for authenticated S3 access, so that users will need to perform a one-time configuration setup before transfers.
Start the configuration by selecting 'NIH HPC Internet2 - AWS S3' as the Collection Name. You will need your AWS Access Key and Secret Key.
- Search for the 'NIH HPC Internet2 - AWS S3' endpoint
- If not already logged in to Globus with your NIH login, you may need to go through the usual NIH authentication
- Allow the Globus permissions
- You will then need to provide your AWS S3 credentials so that Globus can access your S3 buckets. This is a one-time setup.
- Enter your AWS Access Key and Secret Key
- You should then see your S3 bucket in the Globus File Manager. You can now use Globus to transfer files in and out of your S3 bucket as with any other Globus transfers.
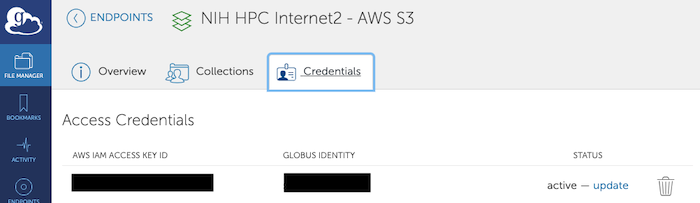
Updating or Deleting your AWS S3 credentials in Globus
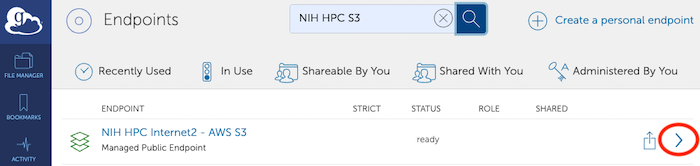
If your AWS access key or secret key changes, or you want to delete them, go to Endpoints, search for 'NIH HPC S3' and click on the right-arrow next to the endpoint name. Select the 'Credentials' tab which will let you delete or update your AWS S3 credentials.
AWS S3 charges
Note that while there are generally no costs incurred in transferring data into S3 (ingress), Globus transfers into S3 can still use S3-outbound data for verification in some cases. As of the Globus S3 connector v0.62 (released mid-2022), data is verified using the normal transfer stream when possible. But in some situations, the connector needs to download the file from S3 to compute the verification checksum -- this includes sync transfers and transfers that are restarted mid-file due to a fault. Thus, there may be some charges when transferring large amounts of data into S3 using the Globus S3 connector.
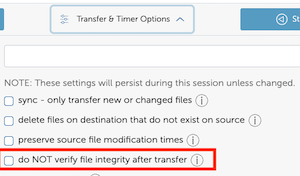
You can avoid or limit these charges by turning off file verification when starting a Globus transfer. This option is found in the GUI under 'Transfer and Timer options'. If using the Globus CLI, use the --no-verify-checksum flag.
The Google Cloud Connector will allow users to transfer data between their Google Cloud Storage and any other Globus endpoint. To utilize this connector, the HPC staff will need enable access to your Google Cloud Storage from this Globus endpoint.
Note that most of the steps below are one-time! Once you have it set up, you should be able to navigate to your Google Cloud Storage bucket in Globus without having to accept all the agreements and so on.
- Contact staff@hpc.nih.gov so that we can enable access to your Google Cloud Storage. You will need to provide us with the identity (e.g. 'aaaa@gmail.com') that you use to access your Google cloud Storage bucket. Do not proceed to the next step until you have confirmation from the HPC staff that we have enabled access for you.
- After we have confirmed that we have set up access for you, in a web browser, navigate to google.com, click 'Sign in', and sign in with the Google account that you use to access your Google Cloud Storage bucket. You may need to go through the Google verification process.
- In the Globus browser File Manager Collection Name box, or in the Globus Collections page, search for 'NIH HPC Google Cloud Collection' and click on it.
- You will be asked to authenticate using the usual NIH login process.
- You can agree to release the information to Globus. It's simplest to 'Send now and in the future'.
- Select your @nih.gov identity as requested on the next screen.
- And agree to allow Globus to manage your data transfer etc.
- Now you should get a screen showing the Collection name. Since this is the first time you are using this collection, you will be required to authenticate again. Select Continue for the initial setup.
- and then 'Continue' for the authentication/consent.
- and then 'Continue' to Register a Credential
- You may need to sign in with Google if you haven't already.
- Allow globus.org permissions to access your Google account. Make sure you select all the boxes. Click 'Continue'.
- In the Globus browser File Manager, you should now be able
to enter 'NIH HPC Google Cloud Collection' in the Collection box, and enter the path of your Google Cloud Storage bucket
in the Path box.
Note that you MUST enter the name of your bucket in the Path box. If you leave that box blank, or enter a default like '/~/', you will get an error -- 'Directory Listing Failed. The server was unable to list the contents of this directory'. - The Path (bucket name) must have starting and ending forward slashes.
GCS charges
Note that while there are generally no costs incurred in transferring data into Google Cloud Storage (ingress), Globus transfers into GCS can still use S3-outbound data for verification in some cases. Data is verified using the normal transfer stream when possible. But in some situations, the connector needs to download the file from GCS to compute the verification checksum -- this includes sync transfers and transfers that are restarted mid-file due to a fault. Thus, there may be some charges when transferring large amounts of data into S3 using the Globus GCS connector.You can avoid or limit these charges by turning off file verification when starting a Globus transfer. This option is found in the GUI under 'Transfer and Timer options'. If using the Globus CLI, use the --no-verify-checksum flag.
The Google Drive Connetor will allow users to transfer data between their Google Drive and any other Globus endpoint. To utilize this connector, the HPC staff will need enable access to your Google Drive from this Globus endpoint.
Note that most of the steps below are one-time! Once you have it set up, you should be able to navigate to your Google Drive space in Globus without having to accept all the agreements and so on.
- Contact staff@hpc.nih.gov so that we can enable access to your Google Drive. You will need to provide us with the identity (e.g. 'aaaa@gmail.com') that you use to access your Google Drive. Do not proceed to the next step until you have confirmation from the HPC staff that we have enabled access for you.
- After we have confirmed that we have set up access for you, in a web browser, navigate to google.com, click 'Sign in', and sign in with the Google account that you use to access your Google Cloud Storage bucket. You may need to go through the Google verification process.
- In the Globus browser File Manager Collection Name box, or in the Globus Collections page, search for 'NIH HPC Google Drive Collection.
- You will be asked to authenticate using the usual NIH login process.
- You can agree to release the information to Globus. It's simplest to 'Send now and in the future'.
- Select your @nih.gov identity as requested on the next screen.
- And agree to allow Globus to manage your data transfer etc.
- Now you should get a screen showing the Collection name. Since this is the first time you are using this collection, you will be required to authenticate again. Select Continue for the initial setup.
- and then 'Continue' for the authentication/consent.
- and then 'Continue' to Register a Credential
- Note that '/My Drive/' will appear in the Path field. In the unlikely event that it didn't, type that manually and hit enter.
A common situation is where a collaborator shares data with you via Google Drive, and you want to download that data directly to Biowulf or to another Globus endpoint.
First, make sure that you can see the data in your Google Drive. Go to https://drive.google.com, log in with your Google identity, click on 'Shared with Me', and confirm that you can see the drectory that your collaborator has shared with you.
The Google account that you used here needs to be enabled for the Google Drive connector as described above.
Once you have that set up, in the Globus File Manager window, you should be able to go to the 'NIH HPC Google Drive Collection', and see the files in yor Google Drive.
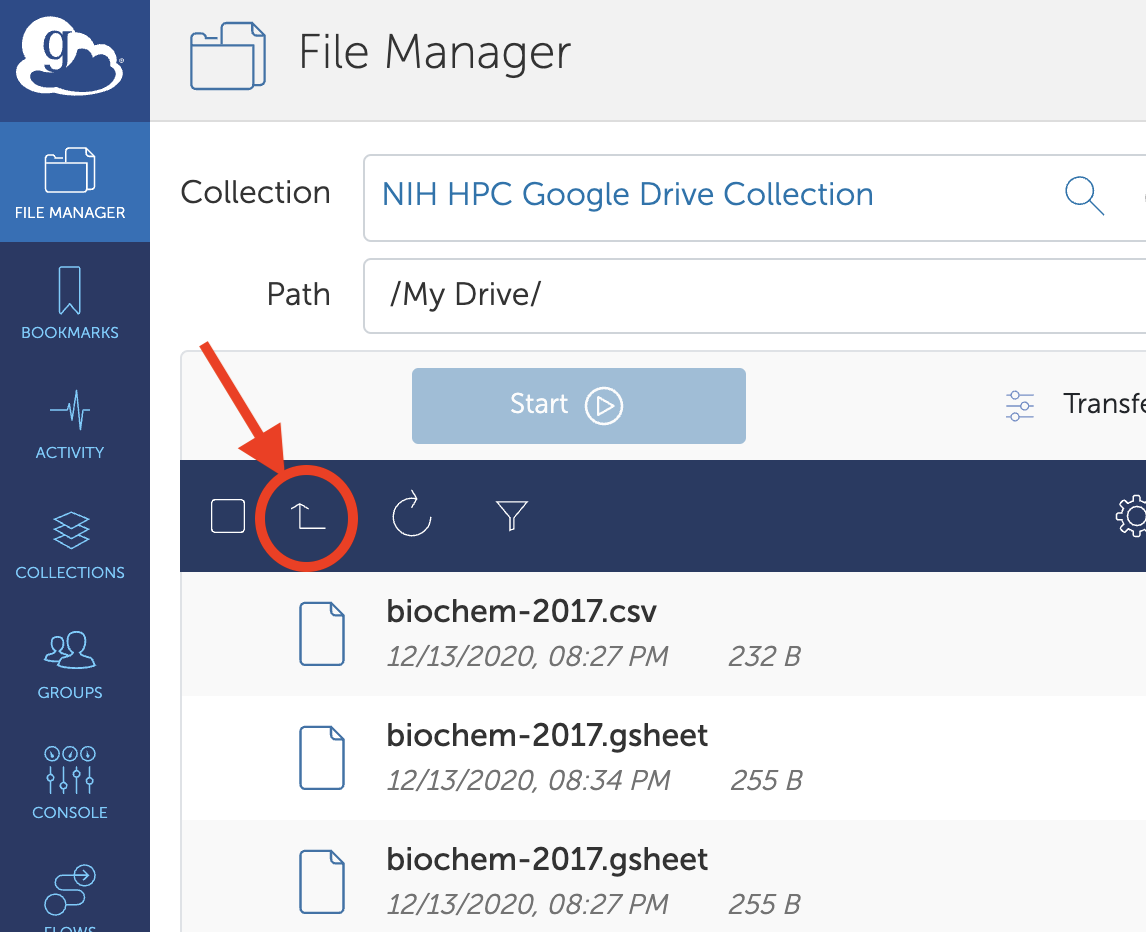
Note that you will not see the directories that have been shared with you. To access, those, click the 'up-one-directory' icon (marked in red above). You should now see the directories 'My Drive', 'Shared with Me', etc. as in the image below. (You can also enter '/Shared With Me/' in the Path box).
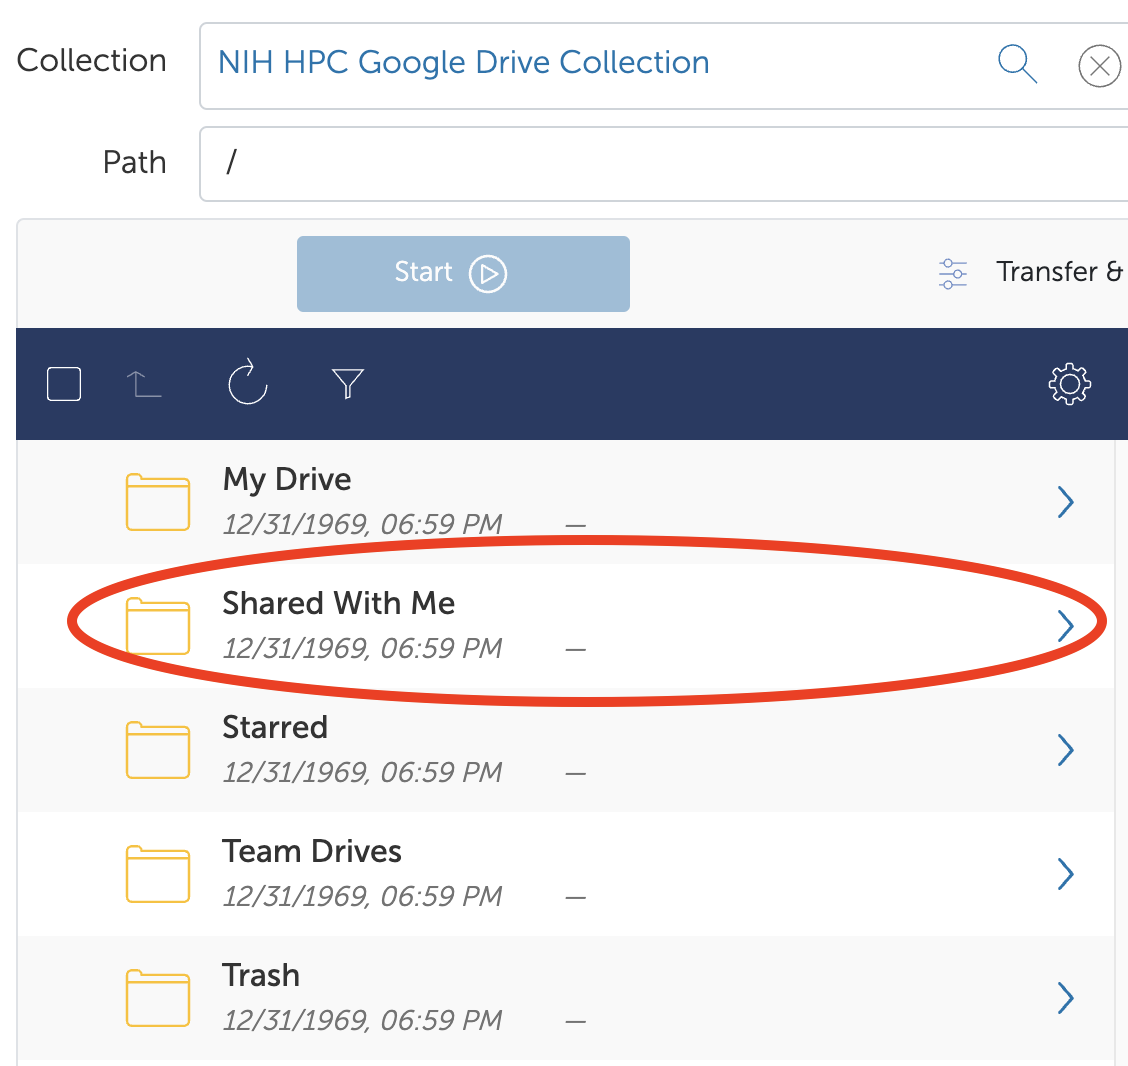
Click on 'Shared with Me', or enter the path as /Shared With Me/, and you should see all the Google Drive files and directories that have been shared with you.
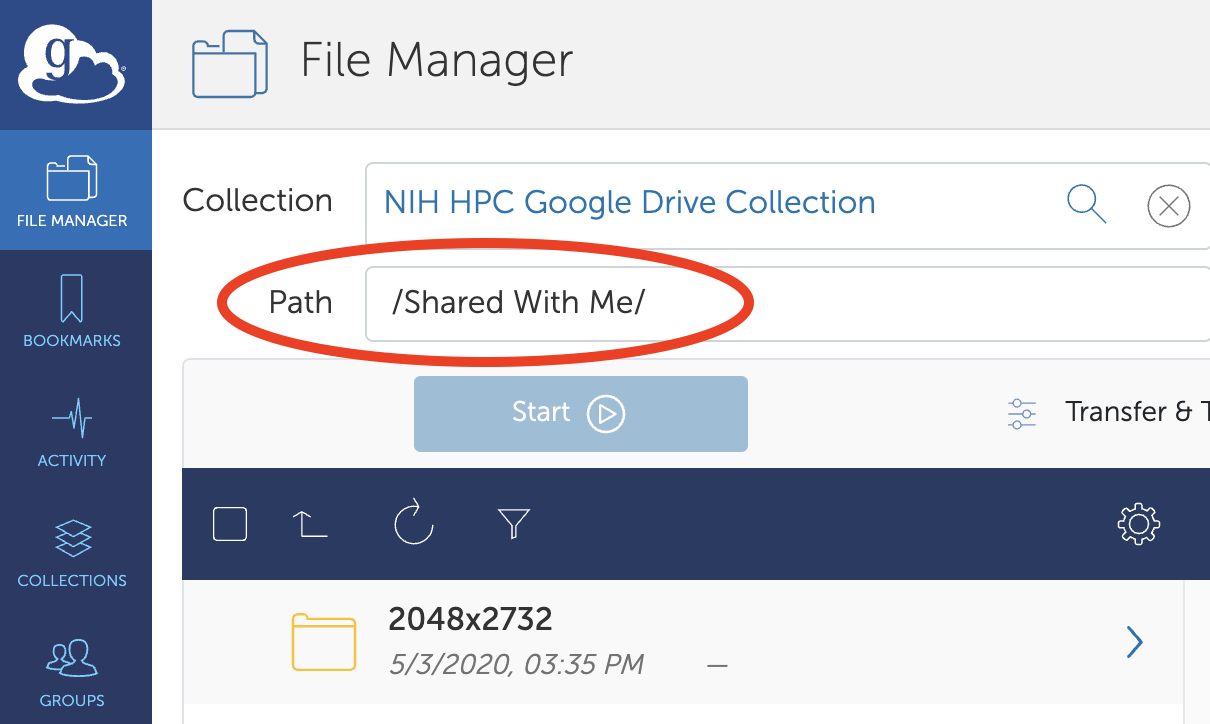
You should now be able to select a directory and transfer it to the Biowulf Globus endpoint "NIH HPC Data Transfer'.